
The mail merge fields that you insert pull in the information from your mailing list, customizing each envelope, email message, label, or letter.
To save you the work of putting each individual field in your document, Word includes the Address Block and Greeting Line tools, which add all the fields for an address or greeting, so you don’t have to add each field one at a time.
Add an Address Block
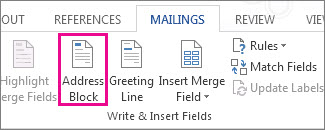
To easily add an address block to your letter, envelope or label use the Address Block tool.
- Click where you want to add the address block in your document.
- Choose Address Block
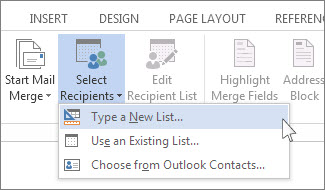
Note: If the Address Block command is grayed out, click Select Recipients and choose the kind of mailing list you’re using—Outlook Contacts, an Excel spreadsheet, or an .mdb file that you created earlier in Word. If you don’t have a mailing list yet, click Type New List to create your list in Word.
Word gives you options for making the name on the address more formal or more informal.
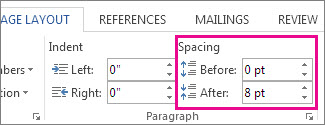
Tip: To make mailing labels single spaced, select the Address Block field, click Page Layout (Word 2013) or Layout (Word 2016) and enter 0 in the Before and After boxes under Spacing.
To make sure addresses in an Excel spreadsheet come through the merge correctly, see Format mail merge numbers, dates, and other values in Excel.
Add a Greeting Line
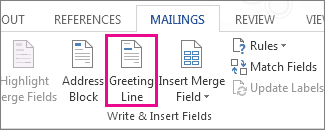
To add a standard greeting to your email message or letter, use the Greeting Line tool
- Click where you want to add the greeting in your document.
- Choose Greeting Line.
Note: If the Greeting Line command is grayed out, choose Select Recipients and select the kind of mailing list you’re using—Outlook Contacts, an Excel spreadsheet, or an .mdb file that you created earlier in Word. If you don’t have a mailing list yet, click Type New List to create your list in Word.
- Choose the name style that you want to use, and set other options.
Tip: To be sure Word finds the names and addresses in your list, choose Match Fields. Check if the fields you want, appear in the list. If a field you want says Not Matched, select the drop-down list for that field and then choose the column name that matches that column in your list.
- To make sure the field is formatted the way you want, highlight the whole field, including the marks at each end.
- Choose Home, and then check the font and font size.
- Choose Line Spacing to make sure the line spacing matches the spacing in the rest of your document.

After you add the fields you want to merge, type the information you want to be the same in each letter, email, envelope or label you create during the merge.
Add individual merge fields
If you want to add information from your mailing list to your document, you can add the merge fields one at a time.
- Click where you want to add the mail merge field in your document.
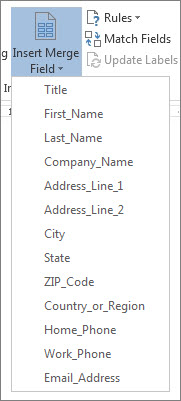
- Choose the drop down next to Insert Merge Field, and then select the field name.
- If you don’t see your field name in the list, choose the Insert Merge Field button.
- Choose Database Fields to see the list of fields that are in your data source.
-
Note: If you don’t see the fields from your data source, check if your document is connected to the correct data source. Choose Edit Recipient List and confirm that the Data Source field matches the source you intended to use.
- Choose Insert.
Note: If some of the numbers, currencies, or dates aren’t formatted right, see Format mail merge numbers, dates, and other fields for help.
Using advanced mail merge fields
When you are creating a letter or an email to all your customers and you want the message to say different things depending on different values in certain fields of your data source – you can use a rule to fill in a field. For example, invoices could include the words “Past Due” if the due date for the balance due is in the past.
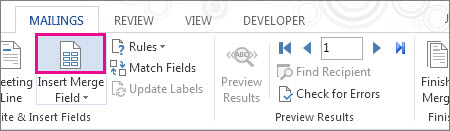
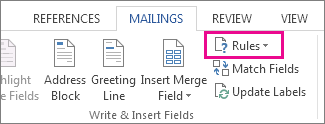
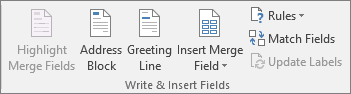
To set up a rule and an advanced field, on the Mailings tab, in the Write & Insert Fields group, choose Rules and select the kind of field you want to add.
For more information about how you can use mail merge rules, see set up mail merge rules
For end-to-end mail merge steps, see Use Word mail merge for email, Mail merge for labels, or Use mail merge to personalize letters
Add Date or Time
To insert the current date and/or time into your document go the Insert tab of the Ribbon and select Date & Time from the Text group. In the Date and Time dialog box select the format that matches what you would like to insert. Click OK to insert your selection.
Use mail merge to send bulk email messages
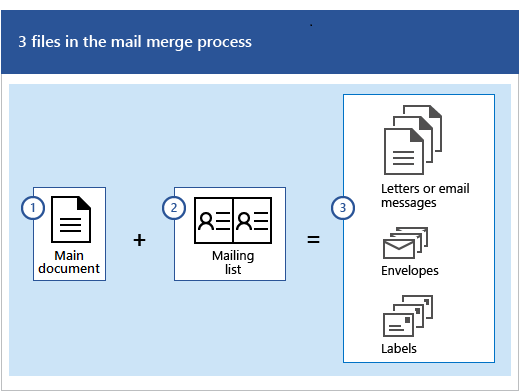
There are three documents involved in creating email messages using the mail merge process:
- Your main document
This document is your email message, it contains text and graphics (a logo or image, for example) that are identical for each version of the merged document. - Your mailing list
This document contains the data that is used to populate information on the letter. Your mailing list has names, for example, and your main document is the email message that will be addressed to the names in your list. - Your merged document
This document is a combination of the main document and the mailing list. Mail merge pulls the formation from the mailing list and puts it in your main document, resulting a personalized, merged document for each person on the mailing list.
Step 1: Prepare your main document
Type the body of the email message you want to send to everyone in Word before you begin. If you’re telling people about an upcoming event, for example, include the name, date, time, and location of the event. Those event details are important for everyone to know.
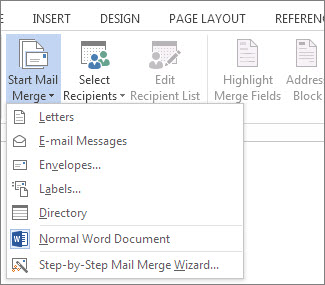
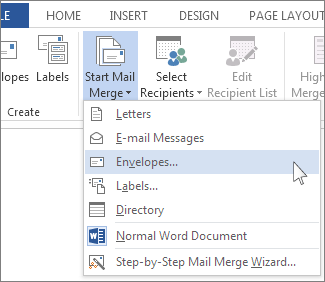
- On the Mailings tab, in the Start Mail Merge group, choose Start Mail Merge > E-mail Messages.
Step 2: Set up your mailing list
In order to send emails, a MAPI-compatible email program like Outlook or Gmail needs to be installed. If you’re using Outlook MAPI, make sure your versions of Word and Outlook are the same.
The mailing list is your data source. It can be a directory of Outlook contacts, an Access database, or an Office address list. It contains the records that Word uses to pull information from to build your email messages.
Tips
- If you don’t have a mailing list, you can create one during mail merge. Before you start the mail merge process, collect all of your data records, and add them to your data source. See, create a new list in Word.
- If you’re using an Excel spreadsheet, make sure the column for ZIP codes or postal codes is formatted as text so that you don’t lose any zeros. For more information see, Prepare your Excel data source for a Word mail merge
- If you want to use your Outlook contacts, make sure Outlook is your default email program. For more information see, Use Outlook contacts as a data source for a mail merge
Step 3: Link your mailing list to your email message
Now it’s time to choose your recipients from a data source (an address list). Make sure your data source has a column for email addresses and that there’s an email address for each person you’re sending the email to.
- On the Mailings tab, in the Start Mail Merge group, choose Select Recipients, and then choose an option.
- Do one of the following:
- If you don’t have a mailing list, choose Type a New List and create one.
or
- If your mailing list is in an Excel spreadsheet, an Access database, or another type of data file, choose Use an Existing List. Then browse to your list and choose Open.
or
- If you’re using your Outlook contacts, choose Choose from Outlook Contacts.
- If you don’t have a mailing list, choose Type a New List and create one.
- Choose File > Save as.
- In the File name box, type a file name, and then choose Save.
Edit your mailing list
If you’re sending email messages to everyone on your list, go to Step 4: Add personalized content to the email message. If you want to send emails only to certain people on your list you can narrow the list, use the steps under Edit your mailing list.
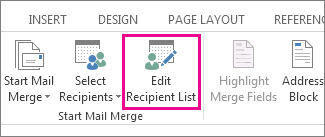
- Choose Edit Recipient List.
- Check the names of the people who you want to receive your email message.
You also can sort or filter the list to make it easier to find names and addresses.
Step 4: Add personalized content to the email message
Personalize each email message by adding a person’s name and address. The best practice for adding these details is to insert merge fields in your main document.
- On the Mailings tab, in the Write & Insert Fields group, choose Address Block.
- In the Insert Address Block dialog box, choose a format for the recipient’s name as it will appear in the email.

- Choose OK to insert the merge field.
- In the Write & Insert group, choose Greeting Line.
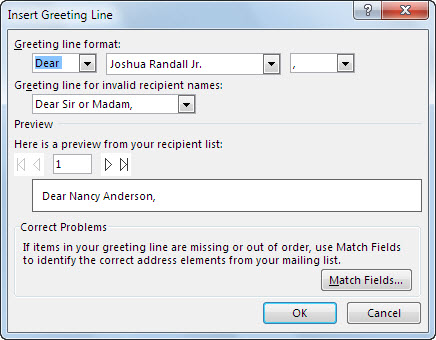
- In the Insert Greeting Line dialog box, choose the format you want to use.
- Choose OK to insert the merge field.
- Choose File > Save to preserve your email.
Note: You’ll need to format your email manually after inserting fields.
You can also add other fields from your data source to your email message. For more information, see Insert mail merge fields.
Verify merge field names
Make sure Word finds the names and addresses in your mailing list.
- On the Mailings tab, in the Write & Insert Fields group, choose Match Fields.
Tip: Merge Fields also can be opened from the Insert Address Block dialog box you used to add an address block to the main document.
- In the Match Fields dialog box, verify that the record fields that appear in the list match the names of column headings for records in your mailing list data source.
Note: There are two columns in the dialog box. The left column is a list of common names in a business record for example. The right column is the field name for the common name that is mapped to a column heading in your data source file.
- Do one of the following:
- If the field names shown match column headings you used for records in your mailing list data source, do nothing.
or
- If (not matched) appears in a field name that you expected to match a column heading in your data source, choose the drop-down arrow, and then choose the field name in your mailing list data source. Repeat as necessary.
- If the field names shown match column headings you used for records in your mailing list data source, do nothing.
- Choose OK.
Format mail merge fields
To change the font, size, or spacing of the merged content, select the merge field name and make the changes you want.
- On the Mailings tab, in the Preview Results group, choose Preview Results to switch from the merged results back to the mail merge fields in your letter.
- Choose the merge field name.
- On the Home tab, choose the font and the font size you want to use.

- On the Page Layout tab (Word 2013) or Layout tab (Word 2016), choose the paragraph spacing you want.

Note: Because Word treats each line in an Address Block as a paragraph, you might want to reduce the spacing between the lines.
Step 5: Preview and finish
After you add merge fields to your main document, you’re ready to preview the merge results. When you’re satisfied with the preview, complete the merge.
- Choose Preview Results, and then choose the Next
 or Previous
  record button to make sure the names and addresses in the body of your letter look right.
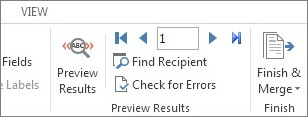
Tip: To go to the start of the list, choose the First
 record button, and to go to the end of the list, choose the Last
  record button.
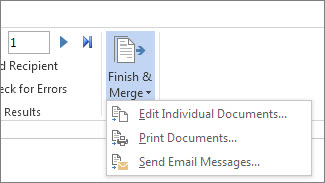
 - Choose Finish & Merge > Send E-mail Messages.
- In the To box, choose the name of the email address column in your list.
Note: Word sends an individual message to each email address. You can’t Cc or Bcc other recipients and you can’t add attachments to the email.
- In the Subject line box, type a subject line for the message.
- In the Mail format box, choose HTML (the default setting) or Plain text to send the document as the body of the email message.
Important: If you send the email message as Plain text, the main document won’t include any text formatting or graphics.
- Under Send records, do one of the following:
- Accept the default setting to merge and send All records.
or
- Choose Current record and only the record viewable on your screen is sent the message.
or
- Choose the last option, and in the From box, enter the record number to begin the merge, and in the To box, enter the record number to end the merge.
Note: An email is not sent to anyone with a record number excluded from the From-To range.
- Accept the default setting to merge and send All records.
- Choose OK to run mail merge.
Step 6: Save the personalized message
Save the email message if you plan to use it for another mail merge.
When you save the main document, you also save its connection to the data source you chose. The next time you open the main document, Word prompts you to choose whether to keep the connection to the data source.
- If you choose Yes, the document opens showing information merged with the first record.
- If you choose No, the connection between the main document and the data source is broken. The main document for the email becomes a standard Word document.
Mail merge with envelopes
Notes:
- If you’re looking for how to create and print labels with mail merge, see Create and print labels using mail merge
- Or, if you’re looking to create letters using mail merge, see Use mail merge to personalize letters for bulk mailings
- Or, if you want to create and send email using mail merge see, Use mail merge to send bulk email messages
These are the documents involved in creating and printing envelopes using the mail merge process:
- Your main document
This document contains text and graphics (a logo or an image, for example) that are identical for each version of the merged envelope. The return address on the envelope is an example of identical content. - Your mailing list
This document contains the addresses to be printed on the envelopes.
When you combine those two documents using the steps below you’ll have your addressed envelopes.
Step 1: Set up your mailing list
The mailing list is your data source. It can be an Excel spreadsheet, a directory of Outlook contacts, an Access database, or an Office address list. It contains the records Word pulls information from to build the addresses to be printed on the envelopes.
Tips
- If you don’t have a mailing list, you can create one during mail merge. Before you start the mail merge process, collect all of your address lists, and add them to your data source.
- If you’re using an Excel spreadsheet, make sure the column for ZIP Codes or postal codes is formatted as text so that you don’t lose any zeros. For more information see Format mail merge numbers, dates, and other values in Excel
- If you want to use your Outlook contacts, make sure Outlook is your default email program.
Step 2: Test your envelope layout
A preliminary step in the mail merge process is to set up the envelope for the merge. It’s always a good practice to run a small test batch of envelopes before you do a real mail merge.
Note: If you’re comfortable with printing envelopes on your system you can skip to step 3.
- In Word, choose File > New > Blank document.
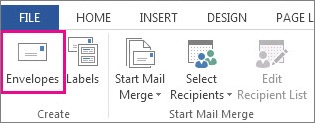
- On the Mailings tab, in the Create group, choose Envelopes.
- In the Delivery address box, type a sample address to test how an envelope will look when it’s printed.
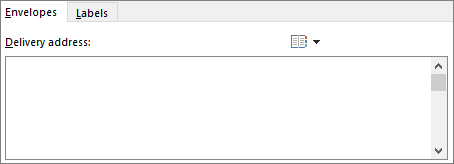
Note: The sample address won’t show up in your mail merge.
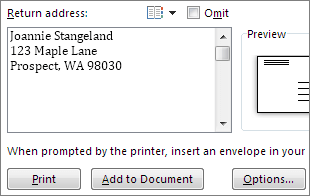
- In the Return address box, type your address.
- Choose Options > Envelope Options and do the following:
- In the Envelope size drop-down list, choose the size that matches your envelope or choose Custom size.
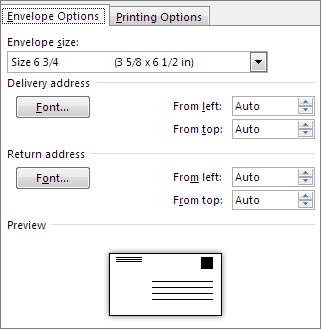
Note: If you choose Custom size, enter the envelope dimensions in the Width and Height boxes. Choose OK when done.
- Under Delivery address and Return address, choose a font and the left and top offset position for each address.
Note: Based on the preview of the envelope layout, make any necessary adjustments to your choices.
- In the Envelope size drop-down list, choose the size that matches your envelope or choose Custom size.
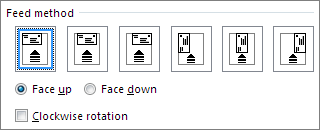
- On the Printing Options tab, confirm the correct Feed method is selected, load the envelope to match the illustration, and then choose OK.
Note: Your printer sends Word information about which way the envelope should be loaded in the printer. This information appears under Feed method.
- Choose Print, and then choose Yes to save the return address as the default address.
Note: If the envelope printed correctly, congratulations, you’re ready to go to the next step in the mail merge process. If the envelope didn’t print as you expected, go back to step 5 and readjust the envelope layout options and the Form Feed options as necessary.
Step 3: Start the mail merge
- On the Mailings tab, in the Start Mail Merge group, choose Start Mail Merge > Envelopes.
- In the Envelope Options dialog box, set up the envelope by choosing options as in Step 2: Test your envelope layout, and then choose OK.
Note: Word creates a document that’s sized to the envelope dimensions and shows where the return address appears on the envelope.
- If you’d like to add a return address, or logo, to your envelope now is a good time to add that.
- Choose File > Save, and add a file name.
Step 4: Link your mailing list to your main document
Now you’re ready to open the data source for your mailing list.
- On the Mailings tab, in the Start Mail Merge group, choose Select Recipients, and then choose an option.
- Do one of the following:
- If you don’t have a mailing list, choose Type a New List and create one.
or
- If your mailing list is in an Excel spreadsheet, an Access database, or another type of data file, choose Use an Existing List. Then browse to your list and choose Open.
or
- If you’re using your Outlook contacts, choose Choose from Outlook Contacts.
- If you don’t have a mailing list, choose Type a New List and create one.
- Choose File > Save.
Edit your mailing list
If you’re printing envelopes for everyone on your list, go to Step 5: Add the address block to the envelope. If you want to print envelopes for people on your list who live, for example, within 20 miles of an event you’re hosting, then use a filter like a ZIP Code or a postal code to narrow the list. For more information on filtering your data see Sort and filter the data for a mail merge.
Tip: You may find it useful to use the filter feature to filter out contacts for whom you don’t have a postal address. That way you don’t waste envelopes that you won’t be able to mail.
To choose individual people on your list that you would like to create envelopes for, do the following:
- Choose Edit Recipient List.
- Check the names of the people who you want to receive your mailing.
You also can sort or filter the list to make it easier to find names and addresses.
Step 5: Add the address block to the envelope
The address block is a mail merge field. Also known as a placeholder, you use the merge field to mark the place where you want addresses to appear on the envelope.
Note: It’s often easier to properly align the address block if you turn on displaying paragraph marks (¶) first. To turn them on go to the Home tab of the Ribbon and click the Show /Hide ¶ button or press CTRL+SHIFT+8.
- Place your cursor were you want the address block to go. If you have show paragraph marks turned on, click immediately after the paragraph mark (¶) that Word has placed in the middle of the envelope.
- On the Mailings tab, in the Write & Insert Fields group, choose Address Block.
- In the Insert Address Block dialog box, choose a format for the recipient’s name as it will appear on the envelope.
Note: Under Preview, choose the Next
or Previous record button to move through records in your data source and view how an address will appear on the envelope. - Choose OK.
- Choose File > Save to save your merge document before proceeding.
Verify merge field names
Make sure Word puts the names and addresses from your mailing list in the right places on your envelope.
- On the Mailings tab, in the Write & Insert Fields group, choose Match Fields.
- In the Match Fields dialog box, the column on the left are the field names that Word uses in an Address Block. The column on the right lets you match up fields in your data source to those field names. Verify that the field names that appear on the left side match the names of column headings for records in your mailing list so Word can put the correct data in the correct place on your envelope.
- Do one of the following:
- If the field names shown match column headings you used for records in your mailing list data source, do nothing.
or
- If (not matched) appears in a field name that you expected to match a column heading in your data source, choose the drop-down arrow, and then choose the field name in your mailing list data source. Repeat as necessary.
- If the field names shown match column headings you used for records in your mailing list data source, do nothing.
- Choose OK.
Step 6: Preview and print the envelopes
Do a final check before you print the envelopes.
- Choose Preview Results, and then choose the Next or Previous record button to make sure the names and addresses on all the envelopes look right.
Tip: To go to the start of the list, choose the First
record button, and to go to the end of the list, choose the Last record button. - Choose Finish & Merge > Print Documents.
Step 7: Save your mail merge envelope document
When you save the mail merge envelope document, it stays connected to your mailing list so that you can use it for your next bulk mailing.
To reuse your envelope mail merge document
- Open the mail merge document for envelopes and choose Yes when Word prompts you to keep the connection.
To change addresses in the envelope mail merge document
- Open the mail merge document for envelopes and choose Edit Recipient List to sort, filter, and choose specific addresses.
Use Outlook contacts as a data source for a mail merge
Perform a mail merge using an Outlook contact list
The most important step in the mail merge process is to setup and prepare your data for mail merge. An Outlook contact card can contain basic information—a name, an email address, and additional information such as a street address, phone number, and photo. To add more contacts to your Outlook address book, see Add a contact.
Once your Outlook contact list is ready, follow the steps below to perform a mail mergewithWord.
- In the Outlook Contacts folder, on the Home tab of the Ribbon, choose Mail Merge.
- In the Mail Merge Contacts dialog box select the options you want. then choose the Document type you want to create. Click OK.

Notes:
- If you only want to mail merge to selected contacts, choose the Only selected contacts radio button. You’ll have to have selected those contacts before you got to this point though, so if you didn’t then choose Cancel, go back to the Contacts folder, select them and start again at step 1.
- If you’ve already got a Word merge document created and saved, change the radio button to Existing document and specify it. Otherwise leave the New document radio button checked and Word will prompt you to create one when you get to step 3.
- If you plan to use this list again in the future, check the Permanent file box and give your contacts file a name to save it. This is especially handy if you have selected a specific set of contacts to merge and will want to reuse that set without having to manually select them each time.
- Microsoft Word will open. Depending upon the options you chose in step 2 you will either have your pre-created merge document or a new, blank, one. Type any text that you would like to have appear on every one of your merged documents.
Note: If you want more help with the mail merge process, on the Mailings tab, in the Start Mail Merge group, chooseStart Mail Merge>Step by Step Mail Merge Wizard. You can refer to the information in this article when you reach Step 3 in the Mail Merge Wizard, Select recipients.
- Insert mail merge fields that pull information from the Outlook contacts list into your document.
Notes: Examples of mail merge fields include:
- Address Block. Use to add a recipient’s full name and address from your Outlook contact list to a letter or an email.
On the Mailings tab, in the Write & Insert group, choose Address Block.
- Greeting line. Use to add a greeting (such as Dear Ms. Mills) to a letter or an email.
On the Mailings tab, in the Write & Insert group, choose Greeting Line.
 For more information about adding merge fields from your Outlook contacts, see Insert mail merge fields.
 - Address Block. Use to add a recipient’s full name and address from your Outlook contact list to a letter or an email.
- When your documentis ready, choosePreview Results, and then choose the Next or Previous record button to see each specific copy of the document.
- To complete the merge process, in the Finish group, choose Finish & Merge, and then choose Print Documents or Send E-mail Messages.
Save your mail merge
When you save the mail merge document, it stays connected to your datasource.
To reuse your mail merge document
- Open the mail merge document and choose Yes when Word prompts you to keep the connection.
To edit your mailing list
- Open the mail merge document and choose Edit Recipient List to sort, filter, and choose specific addresses.
About mail merge fields
The placeholders, such as address and greeting, are called mail merge fields. Fields in Word correspond to the column headings in the data file that you select.

1. Columns in a data file represent categories of information. Fields that you add to the main document are placeholders for these categories.
2. Rows in a data file represent records of information. Word generates a copy of the main document for each record when you perform a mail merge.
By putting a field in your main document, you indicate that you want a certain category of information, such as name or address, to appear in that location.
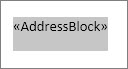
Note: When you insert a mail merge field into the main document, the field name is always surrounded by chevrons (« »). These chevrons do not show up in the merged documents. They just help you distinguish the fields in the main document from the regular text.
When you merge, information from the first row in the data file replaces the fields in your main document to create the first merged document. Information from the second row in the data file replaces the fields to create the second merged document, and so on.
Add the fields, or placeholders
- In the main document, type any content that you want to appear on every copy of the document.
To add a picture, such as a logo, click Picture in the Illustrations group on the Insert tab.
- Click where you want to insert the field.
- Use the Write & Insert Fields group on the Mailings tab.
- Add any of the following:
Address block with name, address, and other information
- Click Address block.
- In the Insert Address Block dialog box, select the address elements that you want to include and the formats that you want, and then click OK.
- If the Match Fields dialog box appears, Word may have been unable to find some of the information that it needs for the address block. Click the arrow next to (not matched), and then select the field from your data source that corresponds to the field that is required for the mail merge.
Greeting line
- Click Greeting line.
- Select the greeting line format, which includes the salutation, name format, and following punctuation.
- Select the text that you want to appear in cases where Microsoft Word can’t interpret the recipient’s name, for example, when the data source contains no first or last name for a recipient, but only a company name.
- Click OK.
- If the Match Fields dialog box appears, Word may have been unable to find some of the information that it needs for the greeting line. Click the arrow next to (not matched), and then select the field from your data source that corresponds to the field that is required for the mail merge.
Individual fields
You can insert information from individual fields, such as first name, telephone number, or the amount of a contribution from a list of donors. To quickly add a field from your data file to the main document, click the arrow next to Insert Merge Field, and then click the field name.
For more options with inserting individual fields in the document, do the following:
- On the Mailings tab, in the Write & Insert Fields group, click Insert Merge Field.
- In the Insert Merge Field dialog box, do one of the following:
- To select address fields that will automatically correspond to fields in your data source, even if the data source’s fields don’t have the same name as your fields, click Address Fields.
- To select fields that always take data directly from a column in your data file, click Database Fields.
- In the Fields box, click the field you want.
- Click Insert, and then click Close.
- If the Match Fields dialog box appears, Microsoft Word may have been unable to find some of the information it needs to insert the field. Click the arrow next to (not matched), and then select the field from your data source that corresponds to the field that is required for the mail merge.
Note: If you insert a field from the Database Fields list and then later switch to a data source that doesn’t have a column with the same name, Word won’t be able to insert that field information into the merged document.
Prepare your Excel 2016 data source for a Word mail merge
Applies To: Word for Office 365 Excel 2016 Word 2016You’ve built a list of contacts and other data that you want to use for a Word mail merge. If your data source is an existing Excel spreadsheet, then you just need to prepare the data for a mail merge. But if your data source is a tab delimited (.txt) or a comma-separated value (.csv) file, you first need to import the data into Excel, and then prepare it for a mail merge. Note: In an earlier version of Excel, you might have used Dynamic Data Exchange (DDE) in combination with the Step-by-Step Mail Merge Wizard in Word. Excel no longer supports DDE. If you’d like us to consider this feature for the next version of Excel, drop us a comment in the Excel Suggestion Box.
Step 1: Set up your data source in Excel
If you’re already using an Excel spreadsheet as your data source for a mail merge in Word, go to Step 2 in this topic. If the data source is a .txt or a .csv file that contains your Gmail contacts, for example, use the Text Import Wizard to set up your data in Excel.
- Open Excel.
- On the Data tab, choose Get External Data > From Text.

- Choose the .txt or .csv file you want, and then choose Import.
- In the Text Import Wizard, in the Original data type pane, choose Delimited.
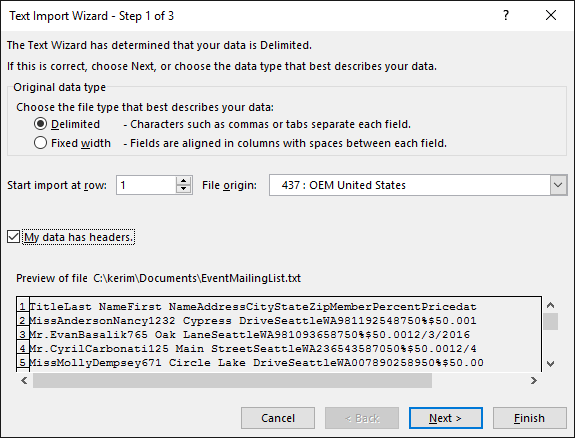
- Select the My data has headers check box above the Preview pane if the file you’re importing has headers, and then choose Next.
- In the Delimiters pane, select the check box that matches the delimiter (such as a Tab or Comma) your data uses, and then choose Next.

Tip: The Data preview pane shows what the results will look like in a table format.
- Under Data preview, choose the column that contains ZIP Codes or postal codes, and under Column data format, choose Text.

Note: Each time you apply a data format—General, Text, or Date—to a column, the name of the format appears in the table header for that column.
- Repeat step 7 as necessary, choosing the column you want to change and the data format you want to apply.
- Choose Finish.
- In the Import Data dialog box, accept the default setting of Existing worksheet and the cell address, and then choose OK.
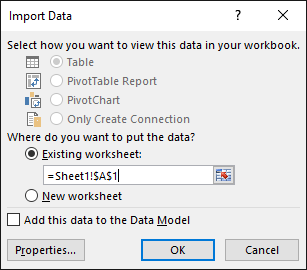
Caution: The cell address in the Import Data dialog box shows the currently selected cell. Data is imported beginning with the named cell address.
- Save your spreadsheet with a new file name.
After you successfully import a .txt or .csv file, go to Step 2.
Step 2: Prepare your data source
In your Excel data source that you’ll use for a mailing list in a Word mail merge, make sure you format columns of numeric data correctly. Format a column with numbers, for example, to match a specific category such as currency.
If you choose percentage as a category, be aware that the percentage format will multiply the cell value by 100. Format a column of percentages as text if you want to avoid that multiplication factor. Also, a column that contains ZIP Codes or postal codes needs to be formatted as text to preserve the data during a mail merge. Leading zeros—for example, 00399—in codes are dropped during a mail merge if they’re not formatted as text.
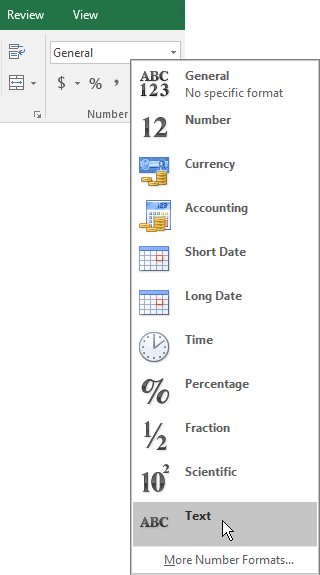
- Open your Excel data source and choose the column that contains the ZIP Codes or postal codes.
- On the Home tab, in the Number group, choose the Number Format (General) box down arrow, and then choose an option in the list.
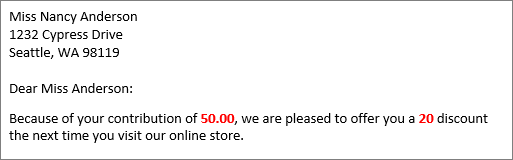
Make sure you add the appropriate symbol before or after a merge field. For example, here’s how the currency and percentage values look if you omit symbols.
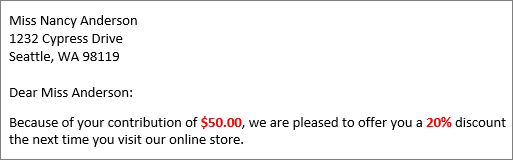
If you include the symbols, the numbers make more sense.
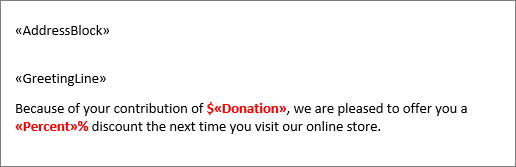
In your mail merge document, you add the symbols before or after the merge fields like this:
If you want to send a mass mailing to an address list that you maintain in a Microsoft Excel worksheet, you can use a Microsoft Word mail merge. The mail merge process creates a sheet of mailing labels that you can print, and each label on the sheet contains an address from the list.
To create and print the mailing labels, you must first prepare the worksheet data in Excel, and then use Word to configure, organize, review, and print the mailing labels. When you want to use address labels to send a mass mailing to your address list, you can use mail merge to create a sheet of address labels. Each label contains an address from your list.
The mail merge process entails the following overall steps:
- Prepare the worksheet data in Excel for the mail merge Before you begin the mail merge process, your address list must match the tabular structure that mail merge requires.
- Set up the labels for the mail merge in Word You set up the layout of the labels one time, for all of the labels in the mail merge. In a mail merge, the document that you use to do this is called the main document. In the label main document, you can also set up any content that you want repeated on each label, such as a company logo or your return address on shipping labels.
- Connect the labels to your worksheet data Your address list is the data source that Microsoft Word uses in the mail merge. In this case, it is an Excel worksheet that contains the addresses to be printed on the labels.
- Refine the list of recipients that you want to include on the labels Word generates a label for each address in your mailing list. If you want to generate labels for only certain addresses in your mailing list, you can choose which addresses, or records, to include.
- Add placeholders, called mail merge fields, to the labels When you perform the mail merge, the mail merge fields are filled with information from your address list.
- Preview, complete the merge, and print the labels You can preview each label before you print the whole set.
- Save the labels for future use
In this article
- Step 1: Prepare the worksheet data in Excel for the mail merge
- Step 2: Set up the labels for the mail merge in Word
- Interrupt and resume a mail merge
- Step 3: Connect the labels to your worksheet data
- Step 4: Refine the list of recipients that you want to include on the labels
- Step 5: Add placeholders (mail merge fields) to the labels
- What happens when you merge?
- Map the mail merge fields to your data file
- Type the content and add the placeholders, or fields
- Set up a view of your contacts that includes custom fields
- Run the mail merge from Outlook
- Format the merged data
- Step 6: Preview and print the labels
- Preview the mail merge
- Complete the mail merge
- Step 7: Save the labels for future use
Step 1: Prepare the worksheet data in Excel for the mail merge
In Excel, your address list must match the tabular structure that mail merge requires.
- On a worksheet, do the following to arrange the address list:
- Use column headers that clearly identify the type of data that each column contains.
Tip: For example, use column headers such as First Name, Last Name, Address, and City instead of Column 1, Column 2, Column 3, and Column 4.
- Use a separate column for each element that you want to include in the mail merge.
Tip: If you store first and last names in separate columns, you can also use the mail merge to create form letters that address each recipient by their first name. You can also add a separate column for a title, such as Mr. or Mrs.
- Include only rows and columns that contain data. Do not include blank rows or columns in the address list, because the list of labels that is created might not be complete beyond the blank rows and columns when you set up the labels for the mail merge in Word.
- Use column headers that clearly identify the type of data that each column contains.
- To help locate and select the address list during the mail merge, do the following to define a name for the address list:
- On the worksheet, select the whole address list, including the cells that contain column headers.
- On the Formulas tab, in the Defined Names group, click Define Name.
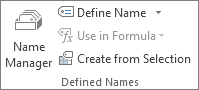
- In the Name box, type a name for the address list, such as Holiday_Cards, and then click OK.
Tip: The first character of a name must be a letter, and you cannot use a space between words. Instead of a space, use an underscore character (_).
- Save and close the workbook.
Top of Page
Step 2: Set up the labels for the mail merge in Word
You configure the layout of the labels just once, for all the labels in the mail merge. In a mail merge, the document that you configure for the layout is referred to as the main document for labels (or label main document). In this document, you can also configure any content that you want repeated on each label, such as a company logo or your return address on shipping labels.
Chances are that you already have a package of label sheets from one of the label sheet suppliers such as Avery, AOne, or Formtec. Each label sheet is a certain size and contains a certain number of labels with specific dimensions.
To configure the label main document, you match its dimensions with the dimensions of the labels on the worksheets that you plan to use.
- Start Word, and open a blank document.
Without a blank document, the commands in the next step are not available. - On the Mailings tab, in the Start Mail Merge group, click Start Mail Merge.
- Click Labels.
- In the Label Options dialog box, you have several choices to make.
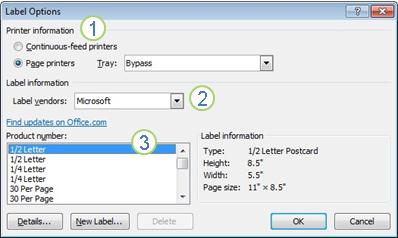
1. The type of printer that you are using to print the labels.
2. The supplier that produced your label sheets.
3. The number that corresponds to the product number listed on your package of label sheets.
- Under Printer information, click the type of printer that you will use to print the labels.
- In the Label vendors list, click the name of the company that made the label sheets that you are using.
- In the Product number list, click the product number that is listed on the box of label sheets.
If the product number for my label sheets doesn’t match any of the choices in the Label Options dialog box, you can still print your labels. You just have to do some customizing:
- Measure the labels on the sheet you have, and note the measurements and how many labels fit on a single sheet.
Note: Measure the labels carefully. The actual label size might be smaller than the size that is indicated by the label manufacturer. For example, a 1-by-2-inch label might actually be 15/16-inch high and 1 15/16-inches wide.
- In the Product number list, select a label type that is similar in size to your labels.
If you don’t see the label type that you want in the Product number box, you may be able to use another of the listed labels, or you can create a new label size.
- Click Details, and then compare the label dimensions and the number of labels per sheet (for labels printed on laser and ink-jet printers) or the number of columns on the label form (for labels printed on dot-matrix printers).
- Do one of the following:
- If the dimensions and label layout match those of your labels, use the selected label.
- If the dimensions and layout do not match yours, click Cancel, and continue to step 5.
- In the Label Options dialog box, click the printer type (either Continuous-feed printers or Page printers), and then click New Label.
- Type a name in the Label name box, select the height, width, margins, and other options for your label, and then click OK.
- Measure the labels on the sheet you have, and note the measurements and how many labels fit on a single sheet.
The new label appears in the Other/Custom category. The next time you use your custom labels, be sure to select Other/Custom in the Label vendors list.
- After you select the label options that you want, click OK.
Word creates a document that uses a table to lay out the labels. If you do not see lines separating the labels in the layout, click the Layout tab under Table Tools, and then in the Table group, click View Gridlines.
Top of Page
Interrupt and resume a mail merge
If you need to stop working on a mail merge, you can save the label main document you are working on and resume the merge later. Word retains the data source and field information in the document that you save. If you were using the Mail Merge task pane when you stopped working on the merge, Word returns to your place in the task pane when you resume the merge.
- When you are ready to resume the merge, open the label main document that you saved.
Word displays a message box that asks you to confirm that you want to open the document and run an SQL command (the SQL command connects Word to your Excel source file).
- Click Yes to connect to your Excel source file and retrieve your address list.
The text of your label main document, along with any fields that you inserted, appears.
- Click the Mailings tab, and resume your work.
Top of Page
Step 3: Connect the labels to your worksheet data
To merge the address information into your labels, you must connect the labels to the worksheet that contains your address list.
- If this is the first time that you have ever connected to a worksheet, do the following:
- On the File menu, click Options.
- Click Advanced.
- Scroll to the General section, and select the Confirm file format conversion on open check box.
- Click OK.
- With the mail merge main document open, on the Mailings tab, in the Start Mail Merge group, click Select Recipients, and then click Use Existing List.
- Locate the Excel worksheet in the Select Data Source dialog box, and double-click it.
- In the Confirm Data Source dialog box, select the Show all check box, then click MS Excel Worksheets via DDE (*.xls) in the Open data source box, and then click OK.
Note: If you do not see MS Excel Worksheets via DDE (*.xls) in the list, you need to make sure that the Show all check box is selected.
- In the Microsoft Office Excel dialog box, for Named or cell range, select the cell range or worksheet that contains the information that you want to merge, and then click OK.
The labels are now connected to the worksheet data, but the sheet of labels is still blank. If needed, you can define the list of recipients as described in step 4, or you can start populating the labels with placeholders for the address information, as described in step 5.
Top of Page
Step 4: Refine the list of recipients that you want to include on the labels
Word generates a label for each address in your mailing list. If you want to generate labels for only certain addresses in your mailing list, you can choose which addresses (records) to include.
To narrow the list of recipients or to use a subset of the records in your data file, do the following:
- On the Mailings tab, in the Start Mail Merge group, click Edit Recipient List.
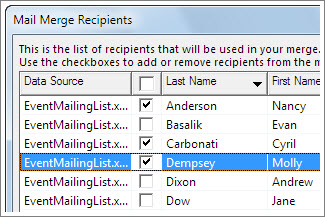
- In the Mail Merge Recipients dialog box, do one of the following:
- Select individual records This method is most useful if the list is short. Select the check boxes next to the recipients that you want to include, and clear the check boxes next to the recipients that you want to exclude.
Tip: If you know that you want to include only a few records in your merge, you can clear the check box in the header row, and then select only those records that you want. Similarly, if you want to include most of the list, select the check box in the header row, and then clear the check boxes for the records that you do not want to include.
- Sort records Click the heading of the column that you want to sort by. Word sorts the list in ascending alphabetical order (from A to Z). Click the column heading again to sort the list in descending alphabetical order (Z to A).
To specify more advanced sorting options, click Sort under Refine recipient list, and then select your sorting preferences on the Sort Records tab in the Filter and Sort dialog box. For example, you can specify that recipient addresses must be alphabetized by last name within each postal code, and that postal codes are listed in numeric order.
- Filter records This method is useful if the list contains records that you do not want to see or include in the merge. After you filter the list, you can select or clear the check boxes to include or exclude specific records.
To filter records, do the following:
- Under Refine recipient list, click Filter.
- On the Filter Records tab in the Query Options dialog box, select the criteria that you want to use to filter your records.
For example, to generate labels only for addresses in Australia, click Country or Region in the Field list, Equal to in the Comparison list, and Australia in the Compare to list.
- To further refine the filter, click And or Or, and then select more criteria.
For example, to generate labels only for businesses in Munich, you specify records whose City field contains Munich and whose Company Name field is not blank. If you use Or instead of And in this filter, your mail merge includes all Munich addresses in addition to all addresses that include a company name, regardless of city.
- Select individual records This method is most useful if the list is short. Select the check boxes next to the recipients that you want to include, and clear the check boxes next to the recipients that you want to exclude.
Note: If you have installed address validation software on your computer, you can click Validate addresses in the Mail Merge Recipients dialog box to validate your recipients’ addresses.
Top of Page
Step 5: Add placeholders (mail merge fields) to the labels
After you connect your labels to your address list, you are ready to add placeholders that indicate where the addresses will appear on each label. You can also type text that you want repeated on each label, such as a company logo or your return address on a shipping label.
The placeholders for the addresses are called mail merge fields. When you perform the mail merge, the mail merge fields are filled with information from your address list. Mail merge fields in Word correspond to the column headers in your Excel worksheet.
1. Columns in a data file represent categories of information. Mail merge fields that you add to the labels are placeholders for these categories.
2. Rows in a data file represent records of information. Word generates a label for each record when you perform a mail merge.
By putting a mail merge field in the original label that you configured in the label main document, you indicate that you want a certain category of information, such as name or address, to appear in that location.
Note: When you insert a mail merge field into the label main document, the field name is always surrounded by chevrons (« »). These chevrons do not show up on the final labels — they just help you distinguish the fields in the label main document from the regular text.
Top of Page
What happens when you merge?
When you perform the mail merge, information from the first row in the data file replaces the fields in the first label. Then, information from the second row in the data file replaces the fields in the second label, and so on.
Working with fields: Examples
When you design labels, you can link any column heading from your data file to a field in a label.
For example, suppose your mailing list is for subscribers to your newsletter, and your data file includes a column, called ExpireDate, which stores the date that each subscription expires. If you insert an «ExpireDate» field in the label main document before you run the merge, subscribers will each see their own expiration date on their mailing label.
You can combine fields and separate them with punctuation marks. For example, to create an address, you can configure the fields in the label main document as follows:
«First Name» «Last Name»
«Street Address»
«City», «State» «Postal code»
For combinations that you use frequently, like address blocks and greeting lines, Word provides composite fields that group a number of fields together. For example, the Address Block field is a combination of several fields, including first name, last name, street address, city, and postal code.
You can customize the content in each of these composite fields. For example, in the address, you may want to select a formal name format (Mr. Roger Harui). In the greeting, you might prefer to use “To” instead of “Dear.”
Top of Page
Map the mail merge fields to your data file
To make sure that Word can find a column in your data file that corresponds to every address element, you might need to map the mail merge fields in Word to the columns in your Excel spreadsheet.
To map the fields, click Match Fields in the Write & Insert Fields group on the Mailings tab.

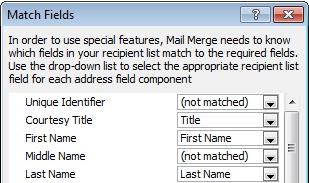
The Match Fields dialog box appears.
The elements of an address are listed on the left. Column headings from your data file are listed on the right.
Word searches for the column that best matches each element. As the graphic illustrates, Word automatically matched the data file’s Title column to Courtesy Title, but Word was unable to match other elements, such as Middle Name.
In the list on the right, you can select the column from your data file that matches the element on the left. It is okay that Unique Identifier and Middle Name are not matched, because the mail merge label does not need to use every field. If you add a field that does not contain data from your data file, it will appear in the merged document as an empty placeholder — usually a blank line or an empty block of space.
Top of Page
Type the content and add the placeholders, or fields
- In the initial label that you set up (in the label main document), type any content that you want to appear on every label.
To add a picture, such as a logo, click Picture in the Illustrations group on the Insert tab.
- Click where you want to insert the field.
- Use the Write & Insert Fields group on the Mailings tab.
- Add any of the following:
- Address Block with name, address, and other information
- Click Address Block.
- In the Insert Address Block dialog box, select the address elements that you want to include and the formats that you want to apply, and then click OK.
- If the Match Fields dialog box appears, this means that Word is unable to find some of the information that it requires to complete the address block. Click the arrow next to (not matched), and then select the field from your data source that corresponds to the field that is required for the mail merge.
- Individual fields
You can insert information from individual fields, such as first name, telephone number, or the amount of a contribution from a list of donors. To quickly add a field from your data file to the label main document, click the arrow next to Insert Merge Field, and then click the field name.
To insert other optional fields in the document, do the following:
- On the Mailings tab, in the Write & Insert Fields group, click Insert Merge Field.
- In the Insert Merge Field dialog box, do one of the following:
- To select address fields that will automatically correspond to fields in your data source, even if the names of those fields are not the same as the field names in Word, click Address Fields.
- To select fields that always take data directly from a column in your data file, click Database Fields.
- In the Fields box, click the field that you want.
- Click Insert, and then click Close.
- If the Match Fields dialog box appears, this means that Word is unable to find some of the information that it requires to insert the field. Click the arrow next to (not matched), and then select the field from your data source that corresponds to the field that is required for the mail merge.
Note: If you insert a field from the Database Fields list and then later switch to a data source that does not contain a column with the same name, Word will be unable to insert that field information into the merged document.
- Custom fields from Microsoft Office Outlook contacts
The only way to include custom contact fields in your main document is to start the mail merge from within Outlook. First set up a view of your contacts with the fields that you want to use in the merge. Then start the mail merge. After you choose the settings that you want, Word automatically starts, and you can complete the merge.
Top of Page
Set up a view of your contacts that includes custom fields
- In Outlook Contacts, on the View tab, click Change View, and then click List.
- Right-click a column heading, and then click Field Chooser on the shortcut menu.
- In the drop-down list at the top of the Field Chooser dialog box, select User-defined fields in folder.
- Drag the field that you to add from the dialog box to the column headings. A little red arrow helps you place the field in the location that you want.
You can add a new field in the Field Chooser dialog box by clicking New at the bottom.
- After you add all of your custom fields to the view, close the Field Chooser dialog box.
- To remove a field that you do not want included in the mail merge, click the field name in the column heading in List view, and drag it off the column heading.
Top of Page
Run the mail merge from Outlook
- In Outlook Contacts, select individual contacts by holding down Shift and clicking to select a range or by holding down Ctrl and clicking to select individuals. If you want to include all the contacts currently visible in the view, do not click any contacts.
- On the Home tab, click Mail Merge.
- If you selected individual contacts to include in the mail merge, click Only selected contacts. If you want to include all the contacts that are currently visible in the view, click All contacts in current view.
- If you configured the List view so that it displays exactly the fields that you want to use in the mail merge, click Contact fields in current view. Otherwise, click All contact fields to make all of the contact fields available in the mail merge.
- If you want to generate a new main document for the mail merge, click New document. Otherwise, click Existing document, and then click Browse to locate the document to use as the main document.
- If you want to save the contacts and fields that you selected so that they can be reused, select the Permanent file check box, and then click Browse to save the file. The data is saved in a Word document as comma-delimited data.
- Under Document type, click Mailing Labels.
- Click OK. When the document opens in Word, on the Mailings tab in the Write & Insert Fields group, click the arrow next to Insert Merge Field, and then click the fields that you want to add to the label main document.
- After you finish setting up the first label the way you want it, in the Write & Insert Fields group, click Update Labels.
Word replicates the layout of the first label to all the other labels.
- You cannot type merge field characters («« »») manually or use the Symbol command on the Insert menu in Word. You must use mail merge.
- If the merge fields appear inside braces, such as {MERGEFIELD City }, Word is displaying field codes instead of field results. This doesn’t affect the mail merge, but if you want to display the results instead, right-click the field code, and then click Toggle Field Codes
Top of Page
Format the merged data
Database and spreadsheet programs, such as Access and Excel, store the information that you type in cells as raw data. Formatting, such as fonts and colors, that you apply in Access or Excel is not stored with the raw data. When you merge information from a data file into a Word document, you are merging the raw data without the applied formatting.
To format the data in the document, select the mail merge field and format it, just as you would format any text. Make sure that the selection includes the chevron characters (« ») that surround the field.
Top of Page
Step 6: Preview and print the labels
After you have added the fields to the original label that you configured in the label main document, you are ready to preview the mail merge results. After you are satisfied with the preview, you complete the mail merge and print the labels. You can then save the label main document for future use.
Preview the mail merge
You can preview your labels and make changes before you actually complete the mail merge.
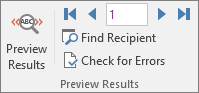
To preview, do any of the following in the Preview Results group of the Mailings tab:
- Click Preview Results.
- Page through each label by clicking the Next Record and Previous Record buttons in the Preview Results group on the Mailings tab.
- Preview a specific label document by clicking Find Recipient.
Note: Click Edit Recipient List in the Start Mail Merge group on the Mailings tab to open the Mail Merge Recipients dialog box, where you can filter the list or remove recipients from the merge if you see records that you do not want to include.
Note: Word uses a table to lay out a sheet of labels on the page. As you page through the labels, the active record is displayed in the first cell of the table, with the following records displayed in subsequent cells.
Top of Page
Complete the mail merge
To print the labels, do the following:
- On the Mailings tab, in the Finish group, click Finish & Merge, and then click Print Documents.
- Choose whether to print the whole set of labels, only the label that is currently visible, or a specific subset of the labels.
To change individual labels, do the following:
- On the Mailings tab, in the Finish group, click Finish & Merge, and then click Edit Individual Documents.
- Choose whether you want to edit the whole set of labels, only the label that is currently visible, or a specific subset of the labels. Word saves the labels that you want to edit to a separate file.
Top of Page
Step 7: Save the labels for future use
Remember that the merged labels that you save are separate from the original label that you configured in the label main document. It is a good idea to save the label main document itself if you plan to use it for another mail merge.
When you save the label main document, you also save its connection to the data file. The next time that you open the label main document, Word will prompt you to choose whether or not to merge the information from the data file into the label main document again.
- Click Yes to open the document with the information from the first record that was merged in.
-
Click No to have Word break the connection between the label main document and the data file, reformat the label main document as a standard Word document, and replace the fields with the unique information from the first record.

